cs2 multiplayer map
A 5v5 CS2 map with balanced sightlines, tactical depth, and just the right amount of suffering (kidding).
TEAM SIZE: SOLO
ROLE: LEVEL DESIGNER
DURATION: 4 MONTHS
SOFTWARE:
Hammer Editor
A competitive 5v5 CS2 map set in a museum, designed for balanced sightlines, verticality, and strategic depth. Inspired by Dust 2’s openness and Nuke’s layered design, the layout was built for fair fights and smooth rotations. Developed independently in Hammer Editor, with real-world architecture and extensive playtesting shaping the final design.

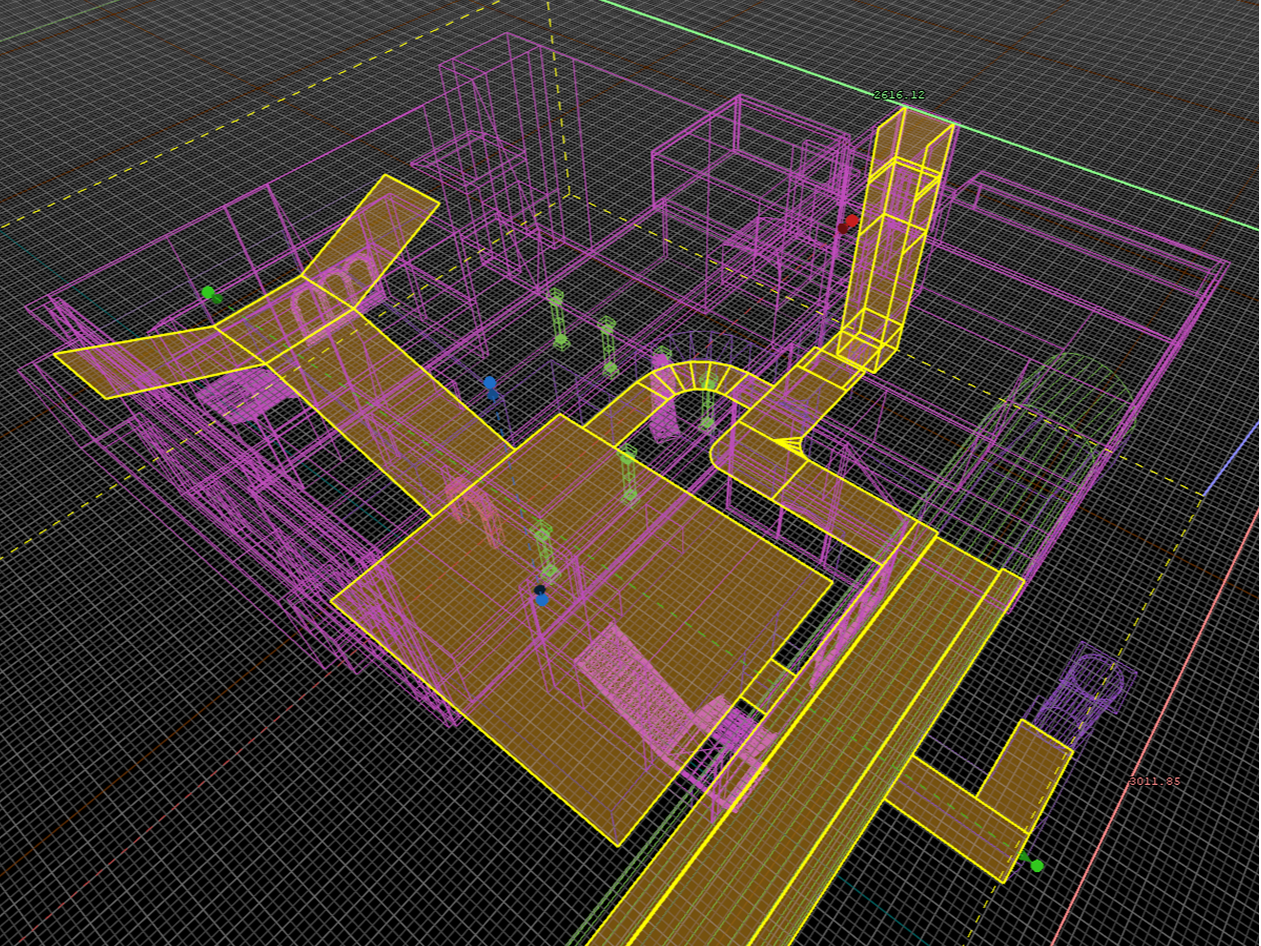
Take a flight through my map! Fullbright mode is our co-pilot for a turbulence-free ride!
design process
No free kills here. If you win, it’s because the design let you.
-
SPAWN POINTS for Ts and CTs
MAIN PATHS toward bomb sites
CHOKEPOINTS for strategic engagements that support different playstyles
SIDE PATHS for flanking opportunities
TESTing & adjustments based on flow and balance
-
Before committing to a layout, I looked at the community’s favorite maps, especially Nuke and Dust 2, and broke them down using the same process — spawns, main paths, chokepoints, and side paths. I sketched out their layouts to understand different levels of complexity, then applied those insights to my own design.
-
CS2 maps are often built around believable locations. I wanted to take that idea a step further by designing a setting that not only worked for gameplay but also had a logical reason for the conflict.
A museum felt like the perfect choice:
Tactical variety: Open exhibit halls contrast with tight corridors, creating natural chokepoints and diverse engagements.
A believable objective: A high-value target like an artifact or painting gives Ts a reason to attack and CTs a reason to stop them.
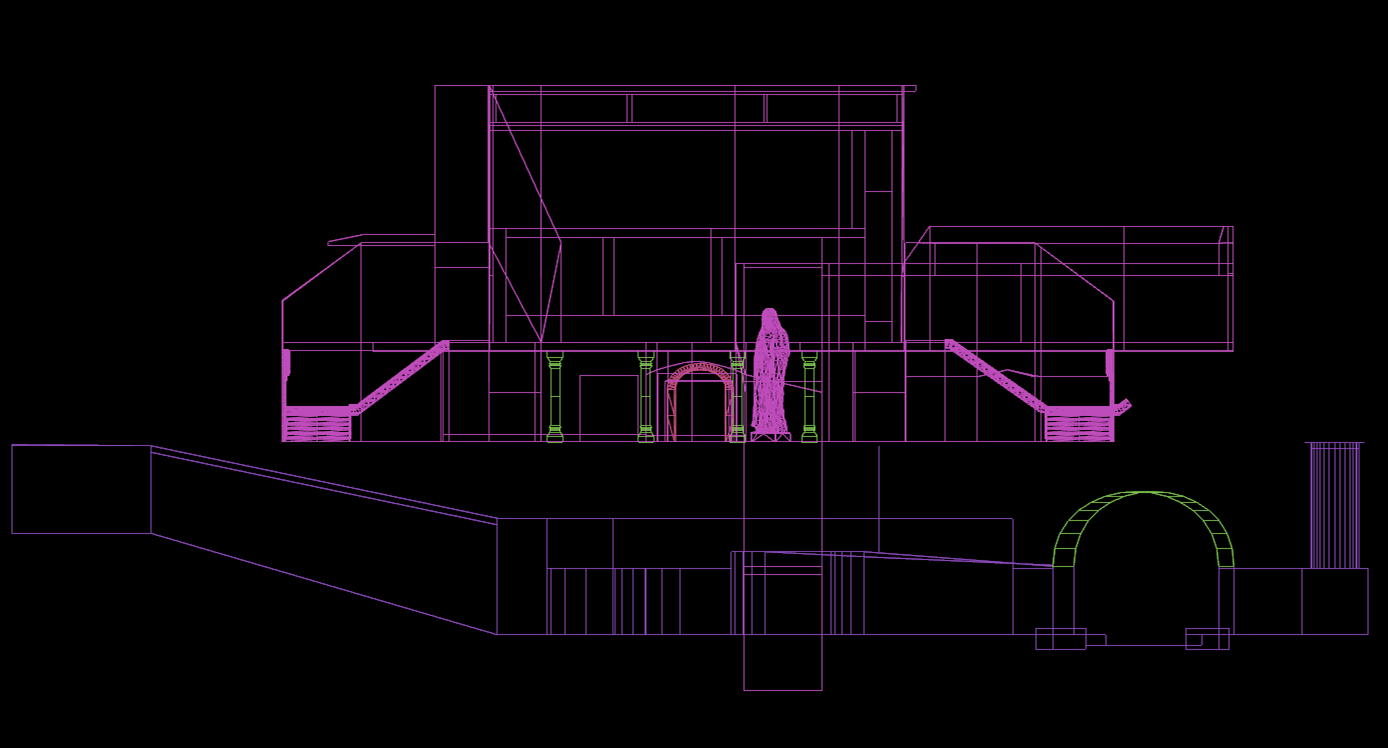
Layered verticality: Museums often have balconies, grand staircases, and underground archives, providing the kind of verticality I wanted to explore.
Suspension of disbelief is important to me when designing spaces. Every sightline, chokepoint, and rotation was shaped by the environment itself, so the action feels natural and not forced. For me, a good map isn’t just fun to play, it should also feel like a place that could actually exist.
-
Once I had an idea of how the map should play, I did rough sketches of how I envisioned the space visually — its theme, setting, and structure. I then moved on to top-down concept maps and asked for feedback, getting theoretical in-game insights before committing to a final design.
-
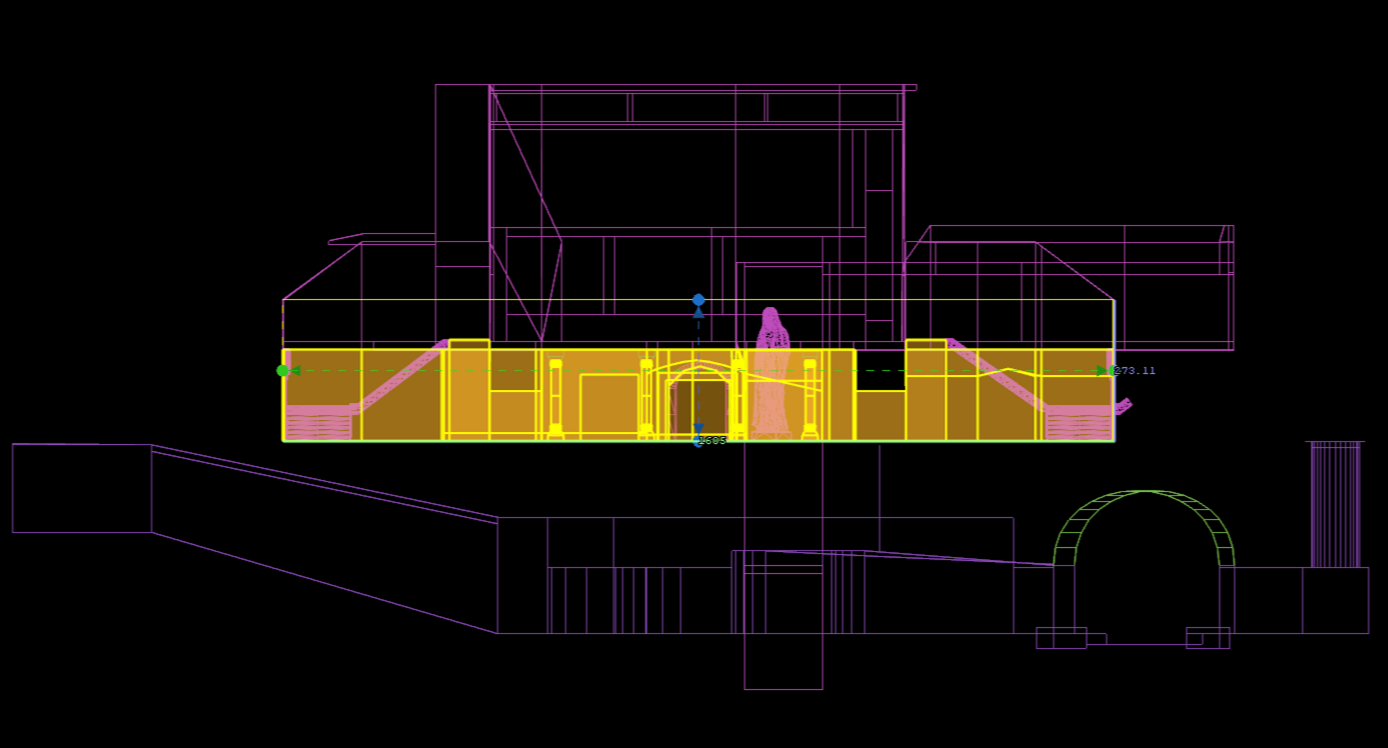
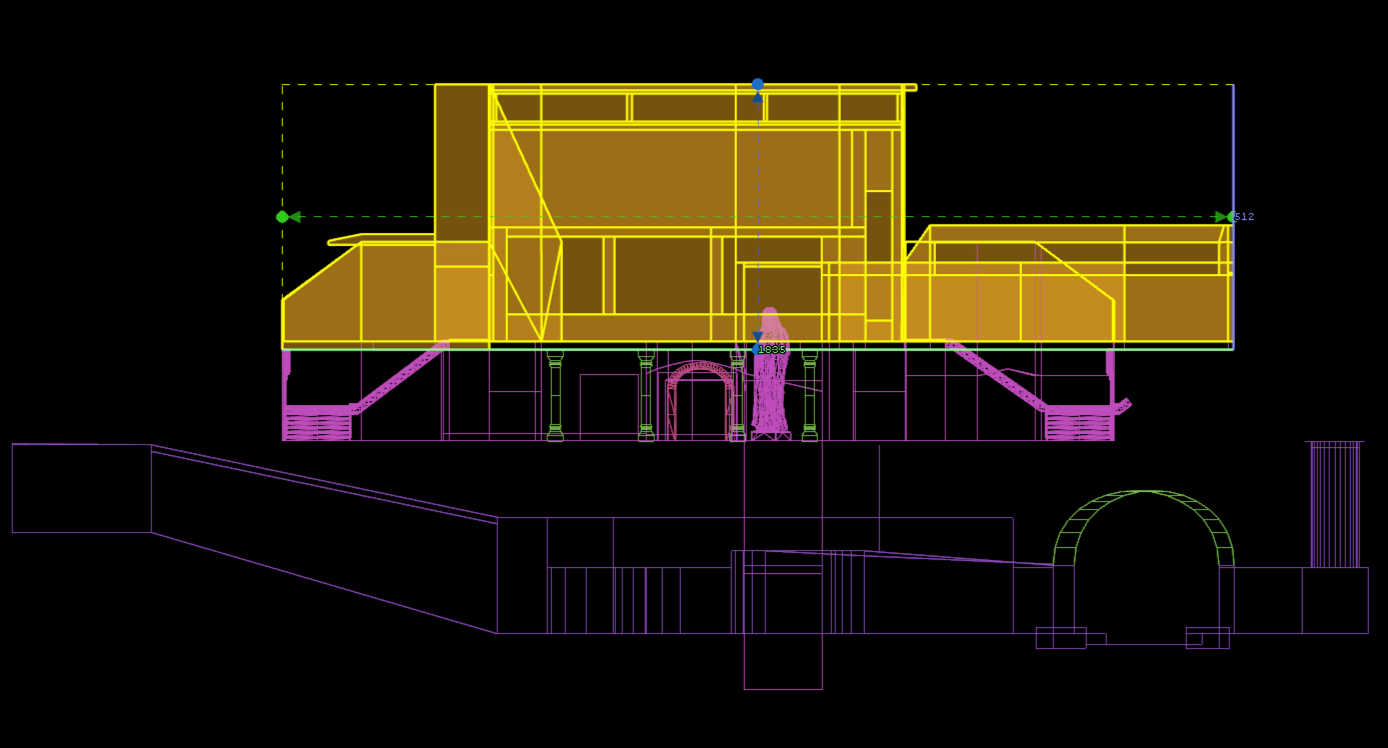
Because my map was three stories, I needed to make vertical movement feel natural. After finalizing the rough isometric, three-story layout, I drew it out, hung it on my wall, and used it as a guide while whiteboxing the level.
-
To make the museum feel like a believable space, I gathered references from real-world architecture:
• Säynätsalo Town Hall by Alvar Aalto influenced the building’s exterior.
• Saint Petersburg architecture inspired the combination of a river and a small bridge, a common sight in that city.
• Museum interiors and sewer systems were referenced to ensure the layout made sense — yes, even the rainwater drain beneath the building had to feel realistic.
When designing the map, I followed a structured approach, starting with the core gameplay elements before moving into theme and set dressing.
My process looked something like this:


Constructing the Framework
SPAWN POINTS ➟ MAIN PATHS ➟ CHOKEPOINTS ➟ SIDE PATHS ➟ TEST, TEST, TEST!
Switch between the different views to see how the layout comes together across all floors!


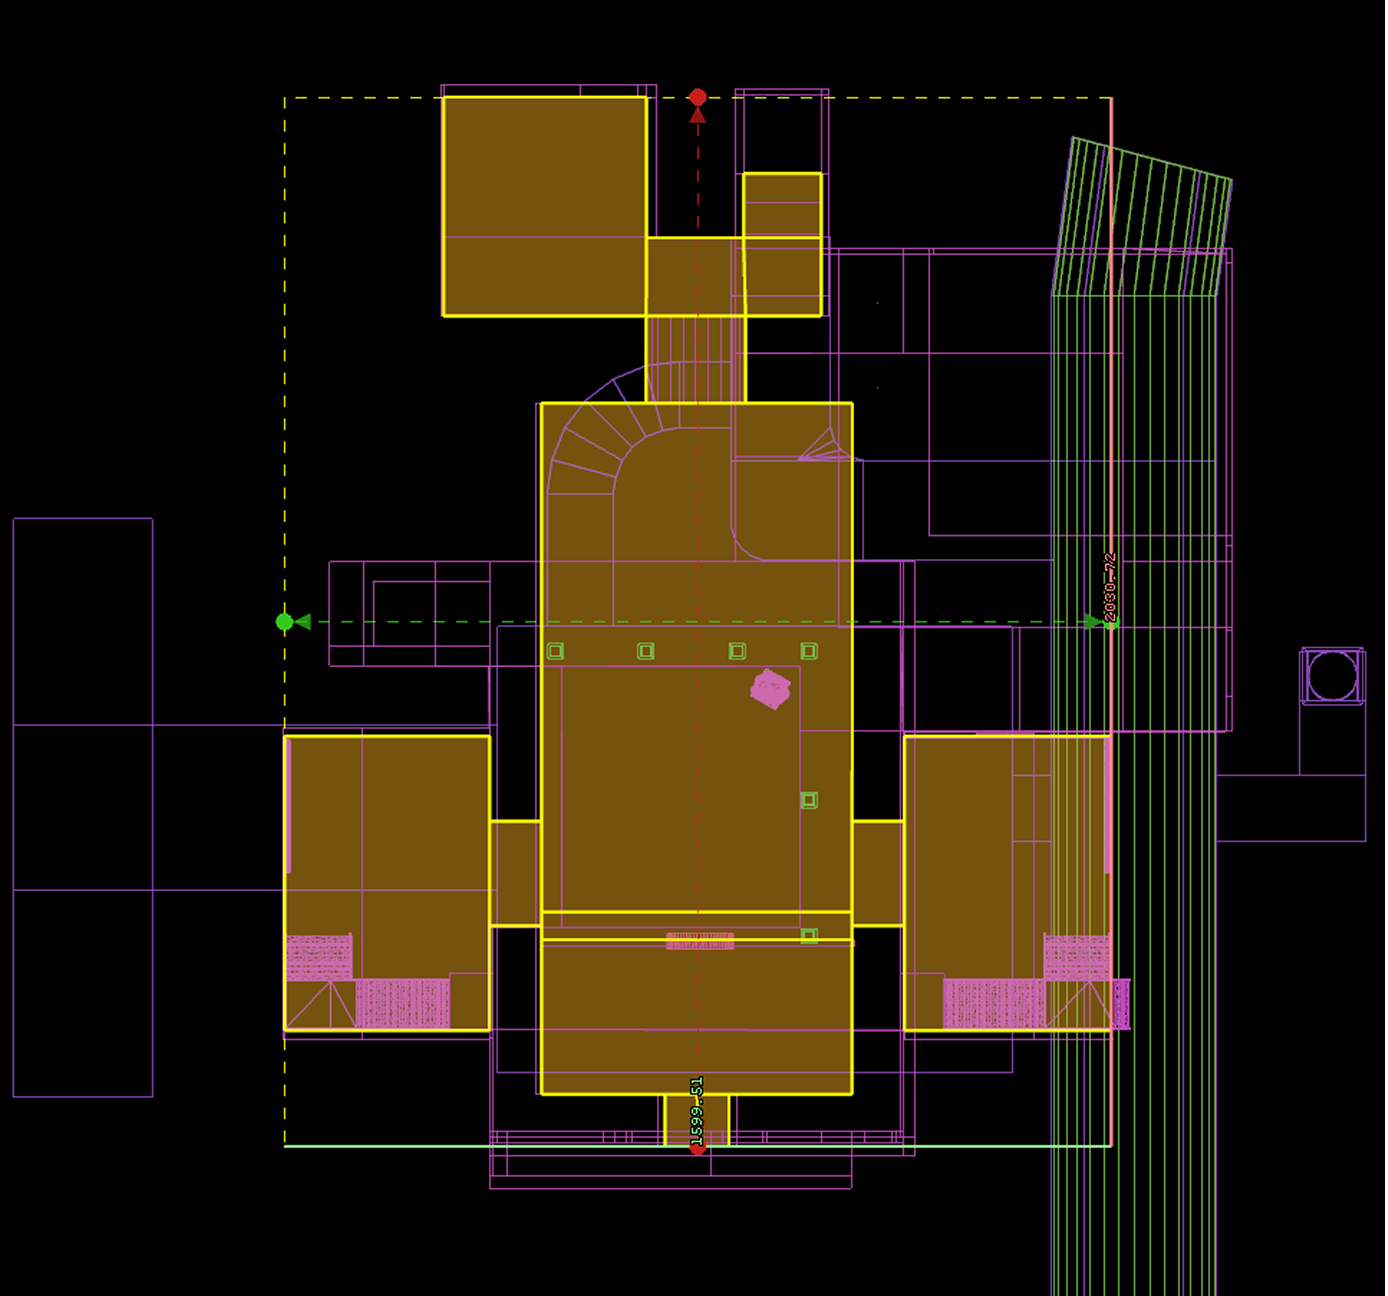
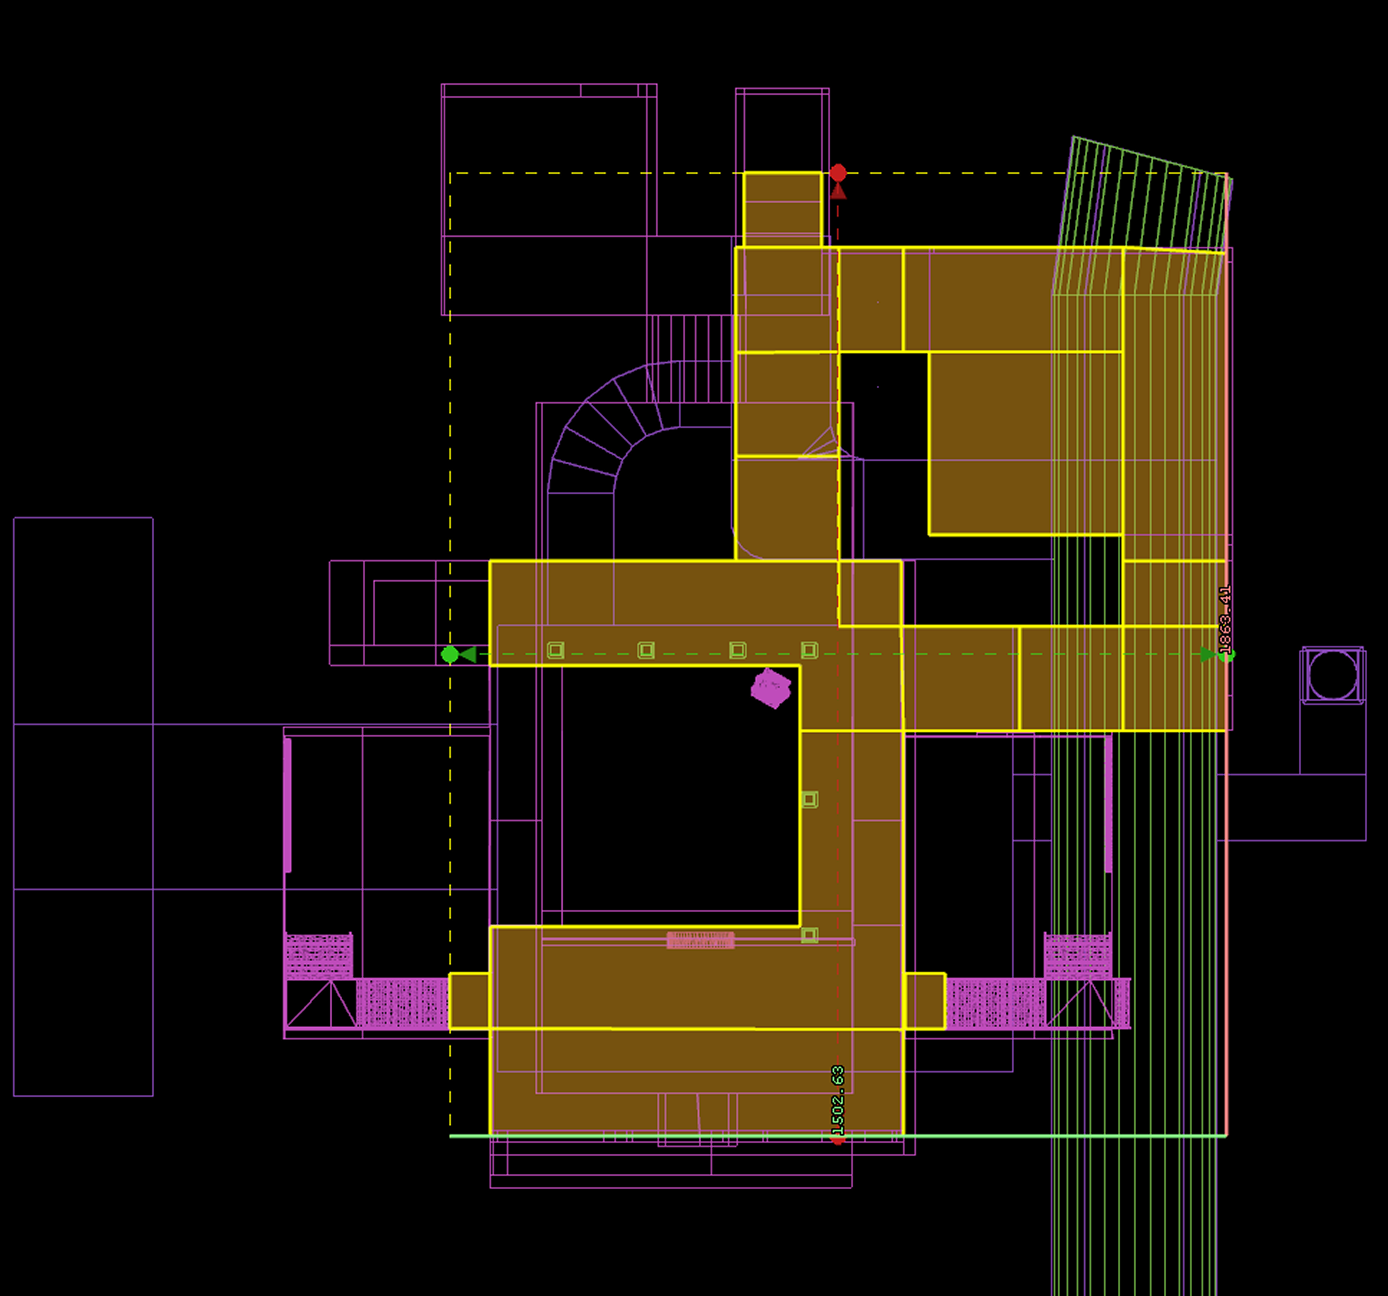

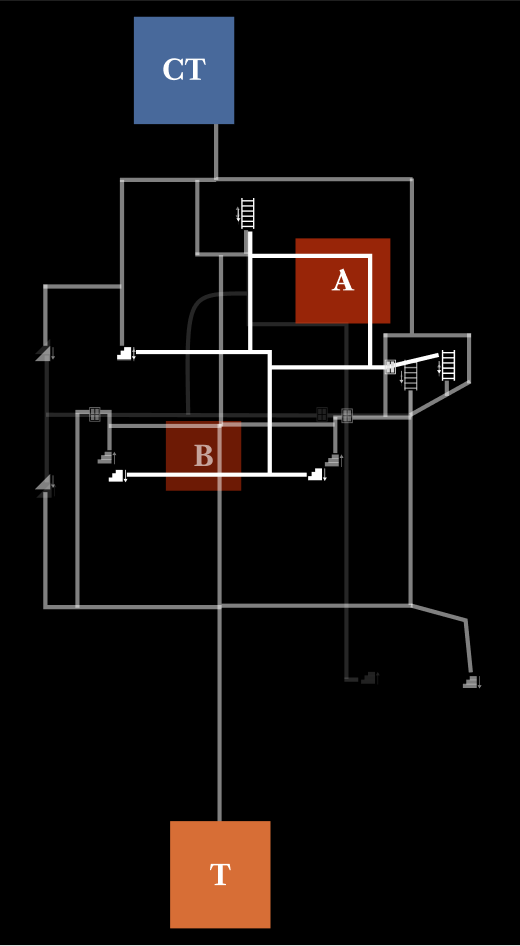


terrorist & COunter-terrorist pathing breakdown
Sections below showcase the flow of movement for both T-Side and CT-Side, split into Main Paths (direct routes towards the objectives) and Side Paths (flanks, rotations, and alternative entries).
t-side main paths
These are the four primary routes Ts take to push toward their objectives. Each path meets a CT-controlled choke point, leading to direct engagements.


LMP (Left Main Path) - Garage Ramp
Route: Leads outside toward the garage ramp, providing a direct approach to B-site.
Choke Point: The ramp itself, where CTs can hold from cover at the garage entrance from above and below.
MMP (Middle Main Path) - Grand Hall
Route: Pushes directly into the building through the lobby, leading to A-site or the second-floor.
Choke Point: The lobby area, where CTs hold long sightlines from both floors.
RMP (Right Main Path) - Bus
Route: Wraps around the right side of the building, using the bus as vertical cover and an alternative entry.
Choke Point: The outside area, where CTs can hold from below or above from A-site.
UMP (Underground Main Path) - Sewer
Route: Drops downstairs into the tunnel, creating a stealthy alternative to B-site.
Choke Point: The long sewer stretch, where CTs can hold from the far end, rotating in through the elevator shaft.
t-side side paths
These alternative routes allow Ts to break away from the main push and create flanking opportunities.

Windows to Second Floor
Ts can break into the left or right wings through the windows, bypassing the main entrance choke point. These paths lead directly to the second floor, granting high ground control over the first floor.
Bus to A-Site
On the right main path, Ts can use the ladder on the bus as a vertical approach, climbing onto it to gain a new angle over the outside or going through the hole for a surprise entry into the building.
Manhole to Sewer
A manhole tunnel behind the bus allows Ts to drop underground, leading into the sewer passage. From there, they can rotate to B-site without taking the contested UMP route
CT-side main paths
These are the main defensive setups for CTs to counter T aggression.


LMP (Left Main Path) - Garage Ramp
Route: CTs hold from the garage entrance, denying access to B-site from outside.
Choke Point: Ramp, where Ts must fight their way in.
MMP (Middle Main Path) - Grand Hall
Route: CTs set up after their storage room, controlling sightlines into the Grand Hall.
Choke Point: Main hallway after the lobby.
RMP (Right Main Path) - Bus
Route: CTs hold from the courtyard or the A-site hole.
Choke Point: Bus area, where Ts attempt to push through to bus and manhole shortcuts.
UMP (Underground Main Path) - Sewer
Route: CTs drop through the elevator shaft to control the long sewer tunnel.
Choke Point: The far end of the tunnel.
ct-side side paths
Counter-terrorists have several routes to reposition, allowing for quick rotations and surprise counterattacks.

Elevator Shaft to Second Floor & Garage
CTs can use the elevator shaft to move between floors, either gaining control of the second floor above the Grand Hall or dropping down into the garage for a faster rotation to B.
Fire Exit to Second Floor
From the Left Main Path (LMP), CTs can take the fire exit staircase to reach the second floor, setting up an alternative hold on A-site or watching mid-round T movements.
B-Site to Garage Rotation
At B-site, CTs can rotate through a side passage (J-Path) leading up into the garage ramp, allowing them to reposition or catch Ts trying to sneak through the lower tunnel. This path provides flexibility in holding or retaking B.
ending note
-
Jumping into Hammer Editor from scratch was both a challenge and an exciting learning experience. This was my first time designing a multiplayer map, and I had to figure out chokepoints, main paths, and rotations to ensure the gameplay felt competitive and balanced. I learned how to plan a 5v5 environment from the ground up, structuring layouts that guide player movement naturally while maintaining tactical depth. Through constant iteration, I refined sightlines, engagement zones, and overall balance, making sure no area felt overpowered or underutilized.
On the visual side, I focused on making the map feel immersive without compromising clarity. I experimented with set-dressing techniques, carefully placing details that enhanced navigation and player awareness rather than cluttering the space. Playtesting was essential, and through multiple sessions—despite the difficulty of getting full teams—I continuously tweaked the map based on real gameplay feedback, adjusting everything from cover placement to rotation times to ensure a smooth competitive experience.
-
One of the biggest challenges was getting full 5v5 playtests. I only managed a full team once—most other sessions were 3v3s, 2v2s, or even 1v1s when testing minor mechanics. Despite this, each session helped refine different aspects of the map.
Another challenge was staying true to my original vision. I wanted a Slavic/Brutalist-inspired environment, but finding the right textures and models was difficult without using outside assets. Luckily, when CS2’s new Train map was released, it provided perfect assets that fit my theme, saving a huge amount of time on visuals.
Beyond that, learning Hammer Editor (Source 2) itself was an obstacle. Everything from lighting to making spaces feel believable took trial and error, but each challenge pushed me to improve.
-
Working in Hammer was incredibly fun, and I’m excited to keep using it in future projects. While the core of the map is fully complete, there’s still room for polish, particularly in the surrounding environment. That said, this project taught me so much about multiplayer level design, and I can’t wait to apply these lessons to new maps.